快速开始
Feat Cloud 面向这样一种场景:你已经接受 Feat Core 的轻量、高性能路线,但在业务项目里仍然希望保留 Controller、Bean、自动装配这些更熟悉的组织方式。
如果你还在评估 Feat,建议先从 Feat Core 快速开始 开始。
这章先不展开配置、数据库或部署。我们只做一件事:写出一个能被编译期识别、启动后可以访问的最小 Feat Cloud 应用。
一个最小应用
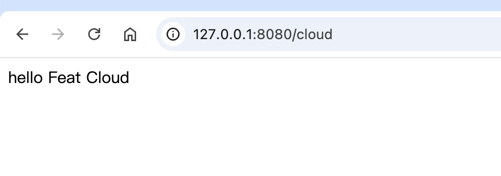
Section titled “一个最小应用”最终效果很小:访问 http://localhost:8080/hello 返回 hello Feat Cloud。
但这条链路会经过 Feat Cloud 最重要的机制:编译期扫描注解、生成服务代码、启动时注册路由。
开始前确认本地已经有 JDK 8+、Maven 3.0+ 和一个能正常运行 Maven 项目的 IDE。
在 pom.xml 中加入:
<!--运行期依赖--><dependency>    <groupId>tech.smartboot.feat</groupId>    <artifactId>feat-cloud</artifactId>    <version>${feat.version}</version></dependency>
<!--编译期生成代码--><dependency> <groupId>tech.smartboot.feat</groupId> <artifactId>feat-cloud-starter</artifactId> <version>${feat.version}</version> <scope>provided</scope></dependency>这里有一个容易忽略的分工:feat-cloud 是运行期依赖,feat-cloud-starter 负责在编译期生成代码。
如果少了后者,应用可以编译到某一步,但 Controller 不会被转成可加载的 CloudService。
编写入口和控制器
Section titled “编写入口和控制器”创建 Bootstrap.java:
import tech.smartboot.feat.cloud.FeatCloud;import tech.smartboot.feat.cloud.annotation.Controller;import tech.smartboot.feat.cloud.annotation.RequestMapping;
@Controllerpublic class Bootstrap {
    @RequestMapping("/hello")    public String helloWorld() {        return "hello Feat Cloud";    }
    public static void main(String[] args) {        FeatCloud.cloudServer().listen();    }}
这个类同时承担两个角色:
main方法是应用启动入口@Controller和@RequestMapping让编译器知道这里有一个 HTTP 路由
在真实项目里,你通常会把启动类和 Controller 拆开。这里合在一起,是为了让第一条链路尽量短。
运行 Bootstrap.main(),控制台出现以下内容说明路由注册成功:
Feat Router: |-> /hello ==> Bootstrap@helloWorldhttp://0.0.0.0:8080/访问 http://localhost:8080/hello:
curl -i http://localhost:8080/helloHTTP/1.1 200 OKContent-Type: text/plain; charset=utf-8
hello Feat Cloud
到这里,你已经跑通了 Feat Cloud 的基本闭环。后面的章节会把这个最小应用拆开:先理解编译期生成的工作模型,再进入 Controller 请求处理、返回响应、Bean 装配、配置与环境、数据库集成和最终部署。