关于
This content is not available in your language yet.
Feat Cloud 提供了一种面向企业级应用开发的解决方案,它的定位有点像 SpringBoot。
设计方面:Feat Cloud 尽最大可能保留了 SpringBoot 的使用习惯,以此降低开发者的学习成本。
技术方面:Feat Cloud 在编译期对代码进行静态分析,最大化提升服务运行性能,降低资源消耗。
引入 Maven 依赖
Section titled “引入 Maven 依赖”创建一个 Maven 项目,在 pom.xml 文件中添加以下依赖:
<dependency> <groupId>tech.smartboot.feat</groupId> <artifactId>feat-cloud-starter</artifactId> <version>${feat.version}</version></dependency>配置 IDEA
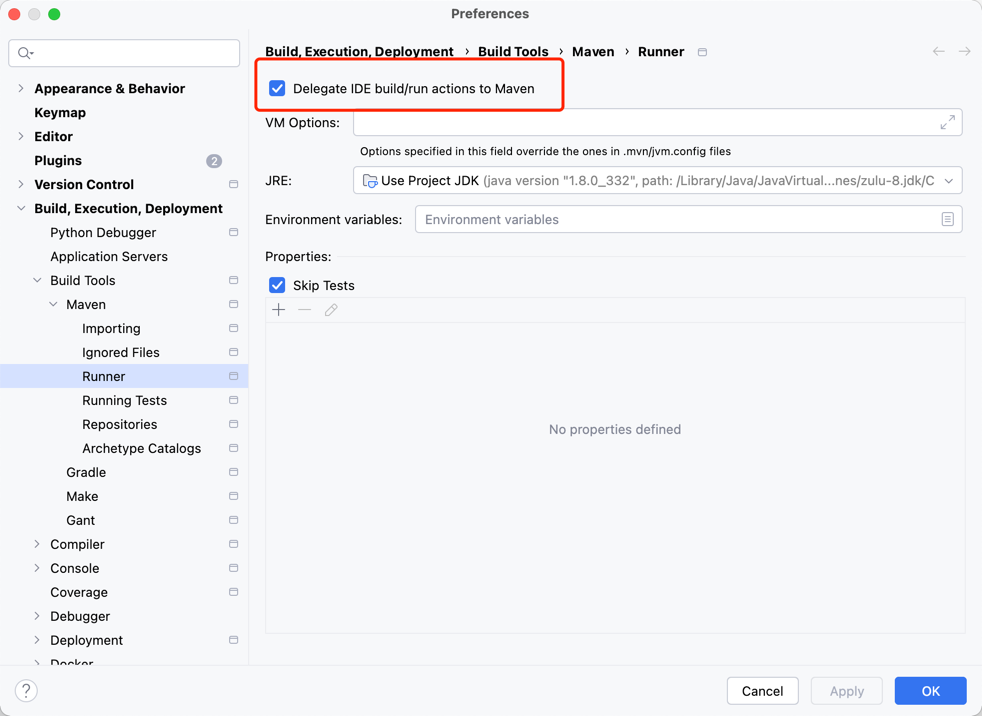
Section titled “配置 IDEA”调整 IDEA 编译配置,以启用 Feat Cloud 的静态优化功能,否则请求将无法正常路由。
设置路径为:Preferences -> Build, Execution, Deployment -> Build Tools -> Maven -> Runner,
勾选Delegate IDE build/run actions to Maven 并点击 OK 保存配置。
在 Maven 工程中创建一个 FeatCloudDemo.java 文件,添加以下代码:
@Controllerpublic class FeatCloudDemo { @RequestMapping("/cloud") public String helloWorld() { return "hello Feat Cloud"; }
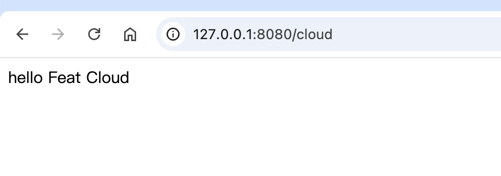
public static void main(String[] args) { Feat.cloudServer().listen(); }}启动程序,打开浏览器访问 http://localhost:8080/cloud。
从上面的代码可以看出,Feat Cloud 是基于注解的方式进行服务开发的。 通常来说,框架会在运行时解析注解并生成对应的服务。
但是,Feat Cloud 却是在编译时对代码进行静态分析,生成对应的服务。 其核心原理是运用了 APT(Annotation Processing Tool)技术,并结合 ServiceLoader 实现了 0 反射的服务加载机制。
以 FeatCloudDemo 为例,开发人员编写的源代码在编译时经过一次静态转码,生成了一个新的 java 文件 FeatCloudDemoBeanAptLoader.java。
@Controllerpublic class FeatCloudDemo {    @RequestMapping("/cloud")    public String helloWorld() {        return "hello Feat Cloud";    }
public static void main(String[] args) { Feat.cloudServer().listen(); }}public class FeatCloudDemoBeanAptLoader extends AbstractServiceLoader { private FeatCloudDemo bean;
public void loadBean(ApplicationContext applicationContext) throws Throwable { bean = new FeatCloudDemo(); applicationContext.addBean("featCloudDemo", bean); }
public void autowired(ApplicationContext applicationContext) {
}
public void router(Router router) { router.route("/cloud", req -> { String rst = bean.helloWorld(); byte[] bytes = rst.getBytes("UTF-8"); req.getResponse().setContentLength(bytes.length); req.getResponse().write(bytes); }); }
public void destroy() throws Throwable { }
public void postConstruct(ApplicationContext applicationContext) throws Throwable {} }可以从静态转码后的代码中看出,对于 bean 的实例化,是通过 new 关键字进行的,而不是通过反射。
对于路由的配置,也是通过调用 Feat Server 中的 Router 方法进行的,也不是通过反射。
因此,Feat Cloud 可以在提供优雅的开发体验的同时,也极大地保留了 Feat Server 框架的性能优势。
Controller 在编译时完成转码后,下一步便是需要在程序启动后能够被正确加载,此处需要用到的技术便是 java.util.ServiceLoader。
Controller 静态转码所生成的类文件默认实现了 tech.smartboot.feat.cloud.service.CloudService 接口,同时会自动生成一个 service 文件:
META-INF/services/tech.smartboot.feat.cloud.service.CloudService
当调用 ApplicationContext@start 方法时:
- 首先通过 ServiceLoader.load(CloudService.class) 加载所有实现了 CloudService 接口的类。并根据
isIgnore规则过滤出有效的服务。 - 遍历所有服务,调用其
loadBean方法,完成 bean 的实例化。 - 遍历所有服务,调用其
autowired方法,完成各实例的依赖注入。 - 遍历所有服务,调用其
postConstruct方法,完成各实例的初始化。 - 遍历所有服务,调用其
router方法,完成 Controller 路由的配置。
public class ApplicationContext {
    ...
    public void start() throws Throwable {        for (CloudService service : ServiceLoader.load(CloudService.class)) {            if (isIgnore(service)) {                continue;            }            services.add(service);        }        for (CloudService service : services) {            service.loadBean(this);        }
        for (CloudService service : services) {            service.autowired(this);        }        for (CloudService service : services) {            service.postConstruct(this);        }        for (CloudService service : services) {            service.router(router);        }    }
...}public interface CloudService { void loadBean(ApplicationContext context) throws Throwable;
void autowired(ApplicationContext context);
void postConstruct(ApplicationContext context) throws Throwable;
void destroy() throws Throwable;
void router(Router router);}在这个步骤中,由于 ApplicationContext@start 中已经完成了所有服务的实例化、依赖注入、初始化、路由配置等工作,因此,最后一步便是将 Router 实例设置到 HttpServer 中,启动服务。
public static HttpServer cloudServer(Consumer<CloudOptions> options) {    CloudOptions opt = new CloudOptions();    options.accept(opt);    opt.serverName("feat-cloud");    ApplicationContext application = new ApplicationContext(opt);    opt.getExternalBeans().forEach(application::addBean);    application.start();
    HttpServer server = Feat.httpServer(opt);    ...    server.httpHandler(application.getRouter());    return server;}